This post is about the configurations
and usage of the WSO2 Identity Server user account creation process
by admin which allows the user to enter the password. This feature is
included in the WSO2 Identity Server 4.5.0 and on-wards.
Overview
When the administrator needs to create
user account from the Identity Server management console it gives
options to either enter the password by administrator directly or
allow user to specify the password. If administrator needs to give
the password to user it might become burden to admin since he/she
needs to give it to the particular user. During this period admin may
loose it before giving it to user. To avoid such situations admin can
use the ask password from user option when creating users with
Identity Server.
The user creation page can be accessed by browsing
Configure → Users and Roles → Users and clicking on Add new user
as shown in the Figure 1.
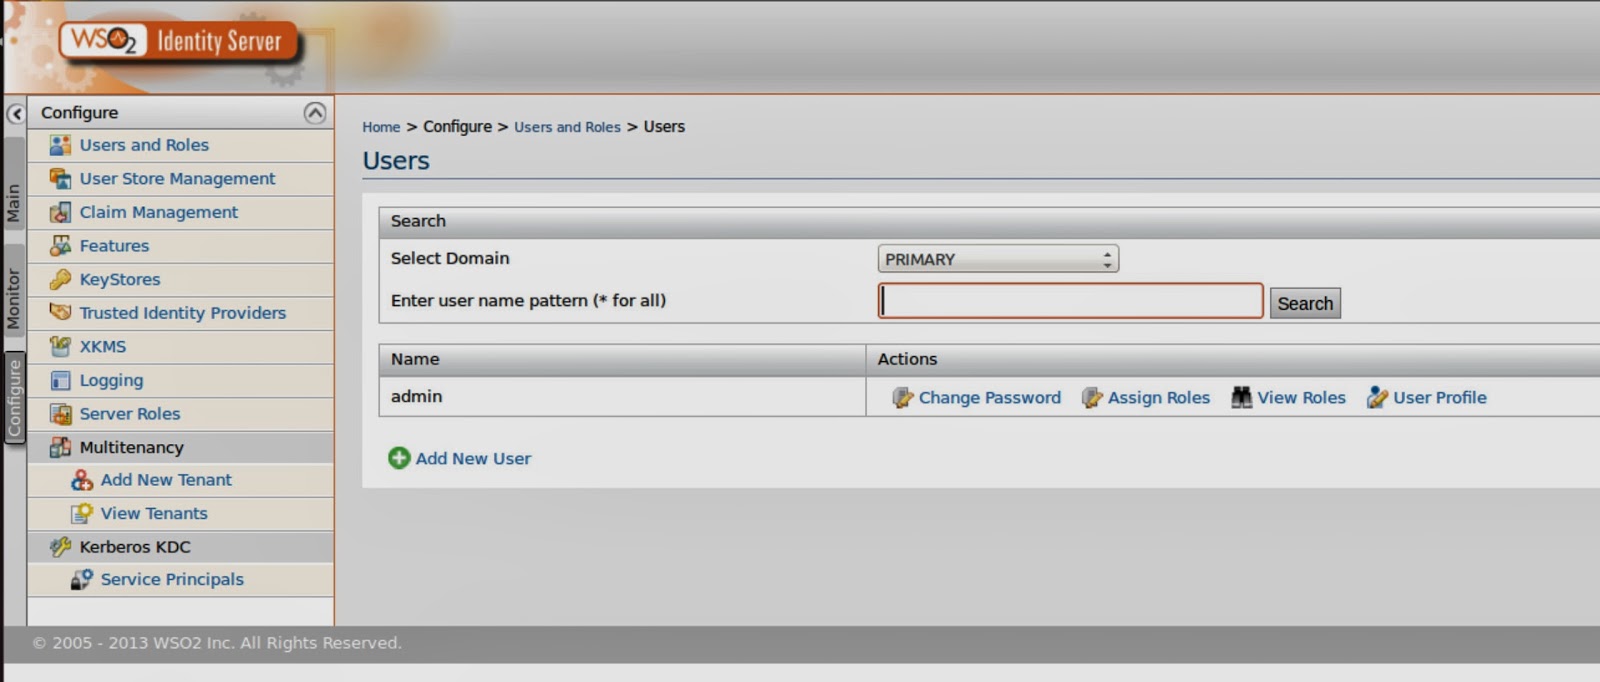
Figure 1 : Add new user
Figure 2 below shows the management
console ui with the ask password from user option selected.

Figure 2 : ask password from user
You need to provide the user's user
name and email address. The Identity Server send an email to this
address by providing the user with a redirect url in which the user
will be directed to provide the password for his/her newly created
account by admin.
The supporting web service is hosted in
the following WSDL by the Identity Server.
https://<is_server>:9443/services/UserInformationRecoveryService?wsdl
Following operations have been used
from the above api.
getCaptcha()
verifyConfirmationCode()
updatePassword()
You can find the sample implementation
of this in the web application here.
Now we will see the configurations
needed for this functionality.
Configuration for Identity Server
Edit the identity-mgt.properties file
with the following located in your Identity Server installation under
<is_server>/repository/conf/security/ directory.
Identity.Listener.Enable=true
Notification.Sending.Enable=true
Notification.Expire.Time=7200
Notification.Sending.Internally.Managed=true
Temporary.Password.Enable=true
UserAccount.Verification.Enable=true
Since notification sending is
internally managed we need to uncomment the email transportSender in
axis2.xml file located under <is_server>/repository/conf/axis2.
Search for <transportSender name="mailto" and provide
your email details as required.
Make sure the following email template
is defined in the email-admin-config.xml under
<is_sever>/repository/conf/email directory.
<configuration type="askPassword">
<targetEpr>http://localhost:8080/InfoRecoverySample/infoRecover/verify</targetEpr>
<subject>WSO2 Carbon - Password
Change for New Account</subject>
<body>
Hi {first-name}
Please change your password for the
newly created account : {user-name}.
Please click the link below to create
the password.
{password-reset-link}
If clicking the link doesn't seem to
work, you can copy and paste the
link into your browser's address
window.
</body>
<footer>
Best Regards,
WSO2 Carbon Team
http://www.wso2.com
</footer>
<redirectPath>../admin-mgt/update_verifier_redirector_ajaxprocessor.jsp</redirectPath>
</configuration>
Here the <targetEpr> holds the
redirect URL which handles the password flow in the sample web
application. Also the contents with curly brases {} will be replaced
by correct values when generating the email.
Then you need to restart the Identity
Server to take effect of the configuration changes.
You need to define the following claim
and map it with a valid attribute of your underlying user store. Go
to Configure → Claim Management → and select "http://wso2.org/claims" → click on Add New Claim Mapping. Here I'm going to map it
with facsimileTelephoneNumber with my ldap user store attribute.
Following are the values that I have given. Figure 3 shows the UI for
this operation.
Display Name: Identity Password
timestamp
Description: Identity Password
timestamp
Claim Uri:
http://wso2.org/claims/identity/passwordTimestamp
Mapped Attribute:
facsimileTelephoneNumber

Figure 3: adding a claim
Configuration for sample web application
Once you have downloaded the sample from here you can directly
deploy the InfoRecoverySample.war
under target directory or you can build it from source.
If you have building from source you need to give the following
context configurations in web.xml.
Give your hosted Identity Server urls as below.
<param-name>carbonServerUrl</param-name>
<param-value>https://localhost:9443/</param-value>
Give the trust store path to the Server
<param-name>trustStorePath</param-name>
<param-value>/home/chamath/apps/wso2is-4.5.1/repository/resources/security/wso2carbon.jks</param-value>
Give your admin username and password of the Identity Server.
<param-name>accessUsername</param-name>
 <param-value>admin</param-value>

<param-name>accessPassword</param-name>
<param-value>admin</param-value>
Also you need to enable the SSL configuration of your web
application container. You can give the same key store file as below
for tomcat under <tomcat>/conf/server.xml. After this change
restart tomcat.
<Connector port="8443" protocol="HTTP/1.1" SSLEnabled="true"
               maxThreads="150" scheme="https" secure="true"
               clientAuth="false" sslProtocol="TLS"
               keystoreFile="/home/chamath/apps/wso2is-4.5.0-7.18.2-SNAPSHOT/repository/resources/security/wso2carbon.jks" keystorePass="wso2carbon" />
If you are directly deploying the InfoRecoverySample.war
file first you need to deploy and stop and do the above
configurations and start again.
Now you are ready to test the functionality.
As shown in the figure 1 go the add new user and select ask
password from user option. You need to give the user name and the
user's email. Then assign the user to a role which has login
permission. And then finish the flow which you will receive a
successful user creation message.
User will be receive a email message with password change for new
account with confirmation link. As instructed in the email click on
the link. You will be directed to a page to enter user name and
captcha as shown in Figure 4.

Figure 4. user name and captcha page
Enter the details and submit which then you will be directed a
page to enter the new password.
Now you can test the new password in effect by login into the
Identity Server management console by giving the user name and new
password.
Hey Chamath, thanks for the post. I have problems following your example, it is documented here: https://stackoverflow.com/questions/23283543/ldap-error-in-identity-server-4-6-when-using-user-registration-with-ask-passwor. Can you please take a look?
ReplyDeleteThanks in advance, Johannes
Hi Chamath, thanks for explaining this. I have got this working when I create the users in super domain. But when I 'create user with ask password' in a tenant domain, the email is being sent. But from InfoRecoverySample app, the call to verify the confirmation code always fails. It seems that this API doesn't support passing the tenantDomain in https://localhost:9443/services/UserInformationRecoveryService?wsdl
ReplyDelete